For most sewing projects I've ever made I've been able to find a tutorial online to help me along the way. However I was not able to find one anywhere for a soft structured child carrier so I decided to wing it and take pictures along the way. I used my Ergobaby carrier for reference a lot to see where things go and how it's put together but some people may not already have a carrier on hand to refer to so hopefully this will be of some help. I would strongly recommend reading through this entire tutorial a few times and really think about what you want to do before you cut into anything.

Supplies:
A pattern. You can draft your own or use the free one in this link: http://www.mediafire.com/download/whdfr3hbm9t/A+SSC+Pattern.pdf
Fabric: 2-3 yards of bottom weight fabric such as home decor, duck canvas, denim, or twill.
Shoulder padding: 1/2 yard 1" high density foam or 1 yard blizzard fleece, cut to fit the area on the strap pattern designated for padding. If using foam, only a single layer is needed. If using fleece, you'll need to make 4 layers.
Waist padding: A single layer of camping mat or a double layer of yoga mat will work best.
Webbing: 10 feet of 1" lightweight polypropylene webbing and 3 feet of 2" lightweight polypropylene webbing.
Buckles: Three 1" buckles, one 2" buckle, and two sternum strap adjusters.
Optional: D-rings to attach toys or other accessories, snaps to attach a hood.
Stores where I got my materials:
http://www.joann.com/
http://www.walmart.com/
http://www.strapworks.com/
http://www.kamsnaps.com/
Note: You will probably have leftover supplies, this allows room for error.

Here are my pattern pieces cut out. I used the free pattern but I had to modify it to make it toddler sized. I added width and height to the body and shortened the shoulder straps and waist strap. The finished body piece ended up being about 17x17. If you plan on adding height to the pattern you will need to shorten the shoulder straps. I shortened mine by 4". And if you are petite you will definitely need to shorten the waist band because this one is very long. Measure your own waist to determine the length you need.
The chevron print is the outer layer (home decor), the orange fabric is the middle layer (duck), and the black fabric is quilting cotton which I chose to go against baby's skin because it's softer than the other fabrics. Because the other two layers are bottom weight, the third layer can be whatever I want. Another popular soft fabric is minky but it may get hotter than quilting cotton.

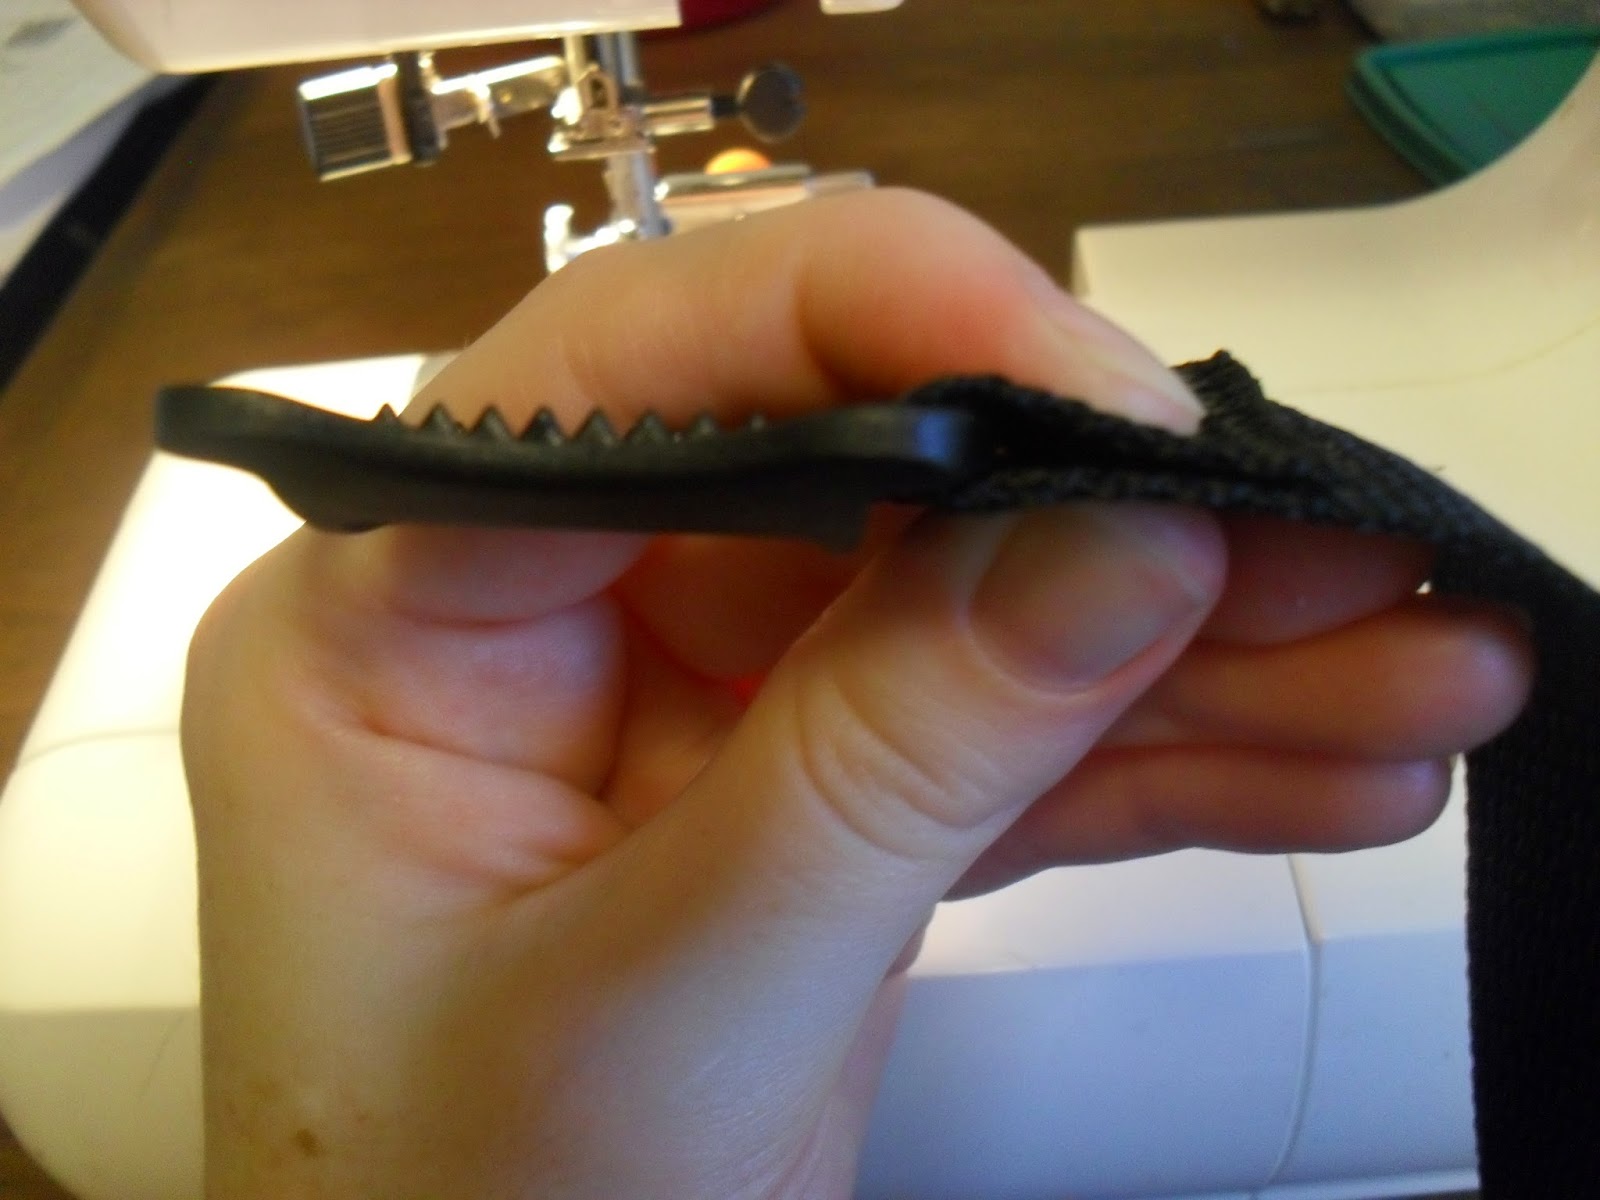
Open up your shoulder straps and press the tapered end under 1/4".

Cut a 4" piece of 1" webbing and thread it through the female end of a 1" buckle. Pin the webbing to one of the tapered ends of the shoulder straps. Before you cut any webbing, know that you will need to burn the ends to keep them from unraveling so have a lighter handy.

Baste it together (just baste for now because you'll topstitch later) using a zipper foot to get close to the edge.

Put the right sides of the strap together sew just the sides (not the short ends) with a 1/2" seam.

Turn right sides out and top stitch 1/8" from the edge and make an x-box over the webbing. I like to draw my x-boxes on with washable marker first to keep my lines straight while I sew. You can kind of see my markings in the picture. I started with a straight stitch and then went over it with a zig zag to make it extra secure but then I decided I didn't like the way it looked and switched to a triple straight stitch (also called a stretch stitch) for all other areas that needed to be reinforced.

To insert the padding you'll peel back the strap fabric until its almost inside out and then stuff the padding in and pull the fabric back over it. This part can be frustrating. Just be patient and work at it, it might take you a few tries.

Sew a line down the middle of the strap to hold the padding in place.
Now I'll show you how to assemble the chest strap. Cut a 9.5" piece of 1" webbing and thread it through one side of a sternum strap adjuster by 3/4".

Hold the webbing in place (or pin if you want) and sew two lines of stitching. I used the triple stitch like I mentioned above.

This is what the triple straight stitch setting looks like.

Now wrap the webbing around the shoulder strap with the sternum strap adjuster centered on the strap. Thread the female end of a 1" buckle onto the open end of the webbing. Be sure that the strap, adjuster, and buckle are all right sides up.

Take the end of the webbing and thread it DOWN (over, not under) through the other side of the adjuster. Pull it back to where it meets the buckle and hold it there.

Stitch it in place with two lines and then we will do the other side.

One side of the chest strap finished.

Cut an 18" piece of 1" webbing and thread it through one side of the other sternum strap by 3/4". Stitch it in place with two lines.

Again, wrap the webbing around the shoulder strap with the sternum strap adjuster centered on the strap. This next part is a little hard to explain but the pictures show it better than I can describe. Fold the webbing to make a crease 1/4" from the strap.

Then thread the webbing UP (under, not over) through the adjuster, keeping that crease in place.

Hold the top piece of webbing against the creased part and sew the three layers together with two lines as close to the strap as you can without catching the strap in your stitching.
Now you can thread the male end of the buckle onto the webbing and secure the end by folding it over 1/4" three times and sewing it down. This will keep the buckle from sliding off the end of the webbing.

Next we will add the webbing which allows the chest strap to slide up and down. Cut an 8" piece (your's may vary depending on how long you made your shoulder straps) of 1" webbing and sew one end to the shoulder strap at the end of the padding with two lines of stitching.

Thread the webbing through the sternum strap adjuster.

At this point I am going to add snaps which is optional depending on whether or not you want a hood. If you do, place the stud end of the snap through the webbing 1/4" from the end. The actual hole where the snap prong goes through will be more like 1/2" from the end but there should be at least 1/4" between the edge of the snap and the end of the webbing.

Sew the webbing down with two lines of stitching.

Your shoulder straps are fully assembled!

We will work on the body pieces now.

Line up the cut edges of the darts and sew those together. Do so for each body piece separately. I used a 1/4" seam for this part.

You can leave the raw edges as is, serge, zig zag, or fray check them. I used fray check.

Now I am going to show you what is, in my opinion, the easiest, fastest, and best looking way to attach the straps to the carrier. First lay your middle layer down right side up, then lay your outer layer down right side up on top of the middle layer.

Next cut two 18" pieces of 1" webbing and pin each piece on either side of the body 6" down from where the straps go and leave 1/2" hanging off the edge.

Now you'll take your shoulder straps and lay them wrong side up, lining them up with the sloped edge where the pattern indicates their placement. Leave 3" hanging off the edge and pin them to the body layers. Be sure you don't have them switched around. The chest strap buckles should be sitting between them, not outside of them.

Take your inner layer (the one that goes against baby) and lay it wrong side up, lining it up with the other body layers and pin all around. Pin it really well! Then sew around the edge (including going over the webbing and straps) leaving only the bottom edge open. Once you've done that, turn it right sides out. You'll be treating the outer and middle layers (chevron and orange) as one layer so keep them together when you turn it.

Ta-daah! Wasn't that easy? Starting to look more like a carrier now.

Finish the webbing by threading the male ends of the 1" buckles onto each webbing piece and secure the ends like you did for the chest strap.

Now I am going to add a headrest and leg padding which is optional but it will add comfort and prevent red lines on baby's neck and legs. Some of you may be thinking "Isn't it too late to do padding?" Nope! You COULD add it right after sewing the darts togther on the body layers as long as you make sure to keep it out of the seam allowance but I'm choosing to do it this way. Ok I lied, I actually forgot to add it when I was supposed to so I have to improvise but either way will work.

You'll need to make 3 half circle shaped pieces of padding from either foam or fleece. Two that are 2" wide and 6" long and one that is 2" wide and 12" long. I use a plate to make the curve even.

Take the longer piece and slip it between the inner layer and middle layer and place it against the top edge of the carrier between the shoulder straps. Pin it in place.

The leg padding also goes between the inner and middle layers and should be placed against the side edge of the carrier 2" up from the bottom. Pin in place.


Time to top stitch. Go around the edge of the padding first and then around the rest of the carrier 1/8" from the edge, skipping the bottom.

To reinforce the shoulder straps and webbing you will sew an x-box over each one. The ones I made on the shoulder straps are 2" square. I used a triple stitch.

The ones I sewed over the webbing are 1" square.

We are ready to start on the waist band! I modified the waist of the pattern to have a little extra material at the top to help attach it more securely to the body. I also shortened it. Take that extra bit of fabric and press it down 1/4", do so for both waist pieces.

Now lay one waist piece right side up on the inner side of the carrier and pin in place.

Make an x-box 1" down from the edge on either side. Set this aside and grab the other waist piece.


Cut a 20" piece of 2" webbing and pin it to the right side of the waist piece, leaving 3" hanging off the edge. Baste in place.

Next you'll cut a 6.5" piece of 2" webbing, thread it through the female end of a 2" buckle and pin it to the waist piece 3/4" from the edge.

Sew it in place with an x-box. This needs to be sewn very securely so it doesn't rip out while you're wearing your baby. I even put a few additional lines through my x-box.

Now just for poops and giggles I'm going to attach a d-ring to the waist so mama can hang her keys or wallet from it. This step is completely optional. Cut a 4" piece of 1" webbing, thread it through the d-ring, and pin in place. Pin it far enough in that its not in the way of the 2" webbing.

Sew it down with 3 or 4 lines, making sure you don't catch the 2" webbing in your stitching.

Take this waist piece and lay it wrong side up on top of the other waist piece and pin them together.


Sew around the raw edges but not across the body.

Clip corners and curves for smoother turning.

Turn the waist and it should look like this.

Take your waist padding and stuff it inside with one end right up against the end where the female buckle is. The other end needs some empty space between the padding and the webbing so we can put an x-box there.

We're very close to being done!

Sew a line across the waist as close to the padding as you can.


Make an x-box between on that empty place between the padding and the webbing.

Thread the male end of the 2" buckles onto the webbing. Be sure its threaded correctly, these ones are harder to tell right side from wrong than the smaller buckles. I threaded mine wrong the first time and it wouldn't grip the webbing.

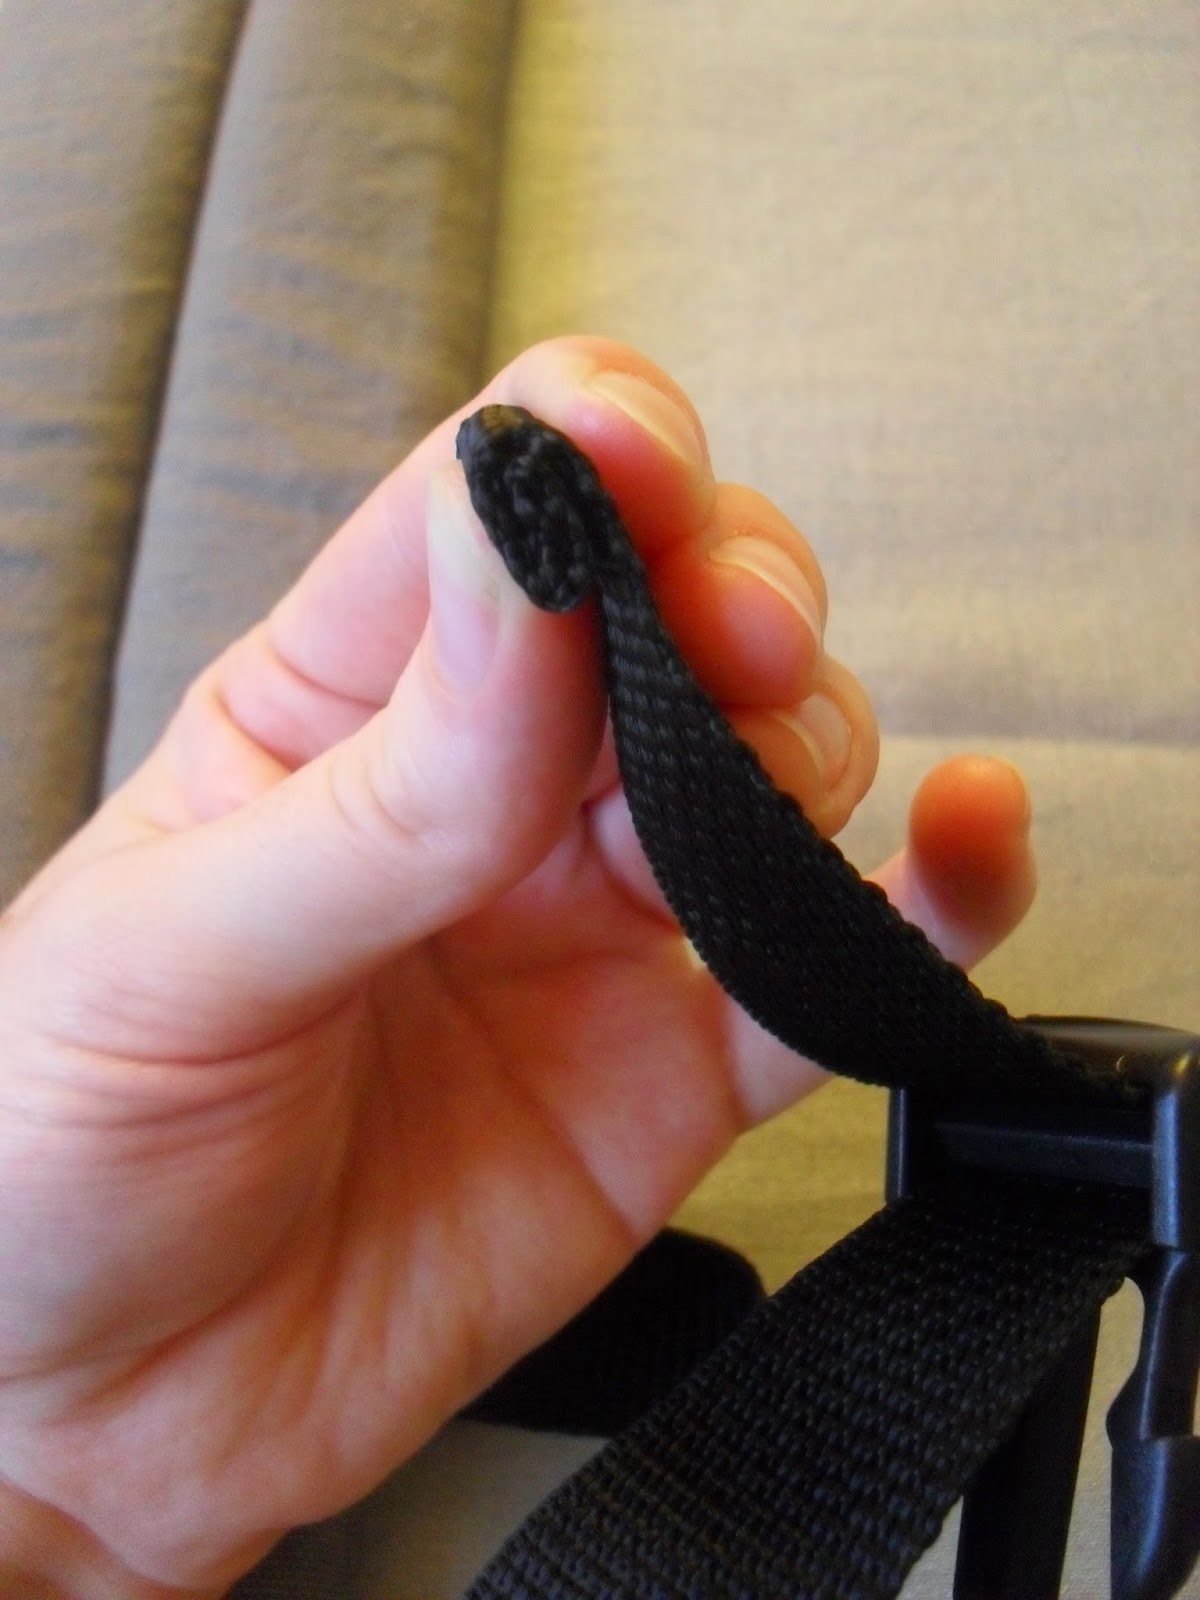
Secure the ends like you did with the other webbing.

Finally you may add another row of stitching across the upper edge of the waist band and your carrier is finished! I did not include steps for making the hood because it's really a very simple thing and I haven't gotten around to making it yet anyway.

Enjoy your new DIY carrier!
The link for the pattern is blank. Could you repost pleaseee?
ReplyDeleteThanks for letting me know, I just updated it!
ReplyDeleteThank you so much! Excited to do this this week. Thanks for the tutorial!
ReplyDeleteDo you have any action shots? I wanted to see if the curved body cuts look better compared to the rectangular bodies. By the way GREAT tutorial!!
ReplyDeleteWhat size for the sternum strap adjusters? 1"?
ReplyDeleteI would like to make myself a performance carrier(regular carriers suck in the Texas heat)but am unsure wh7 h material to use for the body.
ReplyDeleteI'd appreciate any input!
I love this! I made one and I love how it turned out. I only had to shorten the waist and I make the shoulder straps longer. Other than that, I love the pattern and your tutorial! Thank you!
ReplyDeleteGreat and fantastic blog. I am interested very much in the subject matter of your blog, it’s my first visit.
ReplyDeletehttp://www.cabbagecases.com
SSC Stenographer Salary 2018-19: SSC Stenographer is one of the most sought after the Central Government jobs in India. Candidates who have passed Class 12 exam from any recognized board are eligible to appear for the exam. The SSC Stenographer job provides decent SSC Stenographer Salary with great opportunities for growth and promotion.
ReplyDeleteHola! Me interesa tu patrón pero está en blanco.
ReplyDeleteThis comment has been removed by the author.
ReplyDeleteThis comment has been removed by the author.
DeleteYo lo he descargado perfectamente, introduce http://www.mediafire.com/download/whdfr3hbm9t/A+SSC+Pattern.pdf en donde va el link, y te aparecerá el archivo en pdf
DeleteHey Everyone the group 4 hall ticket download is now available for all the candidates on our website.
ReplyDeleteClick on the download link after visiting the website and download your hall ticket in easy steps.
Thanks.